

Getting started with wolfSSL has never been easier. We’ve recently updated our library as published on the Arduino libraries site, listed in the “Communications” section:
https://www.arduino.cc/reference/en/libraries/wolfssl/
To use wolfSSL in the Arduino IDE, download the latest IDE version from arduino.cc and follow the installation instructions.
Note that if you used any version of wolfSSL prior to v5.6.6.Arduino.1, those versions have been removed from the Arduino registry as they were not Official wolfSSL Arduino releases.
To install wolfSSL, click on Tools… Manage Libraries:
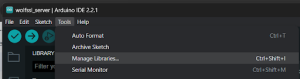
Type wolfssl in the search box, then press the Install button.
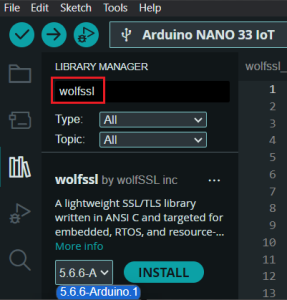
Additional details can be found in the Arduino documentation for installing libraries for V1 or using the Arduino IDE V2 installation method.
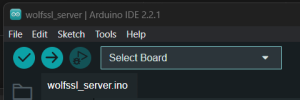
When the sketch is opened, click on the “Select Board” dropdown:
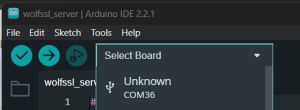
In the case of Windows, click on the COM port that has your device, here for COM36:
Enter part of name to more quickly find the desired board selection:
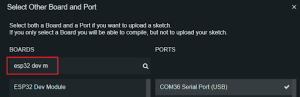
Click on the desired board and click the OK button.
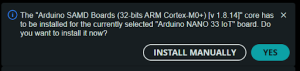
For Arduino brand and compatible boards, the Arduino IDE will prompt if libraries are needed to be installed:
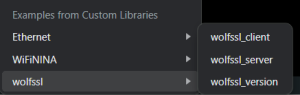
There are two main examples for wolfSSL: a TLS client and a TLS server. The most recent code can be found in the IDE/Arduino directory on GitHub.
To use the examples from the Arduino IDE Library, click on File… Examples. See the wolfSSL sample sketches in the “Examples from Custom Libraries” at the bottom of the list:
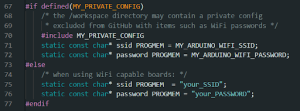
Note that both the Client and Server examples need a network connection. Most boards will need to have WiFi parameters set for this. See the beginning of the sketch for setting a file (typically outside the scope of any GitHub repository, to be kept private):

Otherwise if you are not using a private file, the values can be entered directly into the source code, shown here for your_SSID and your_PASSWORD:
Once the sketch is loaded and a board (and serial port) are selected, simply press the upload button as with any other Arduino sketch.
If using the Server example, make note of the IP address assigned. By default a DHCP address is requested, so the value will be specific to the SSID / Access Point.
If using the Arduino Client, not only do the WiFi settings need to be assigned, but also the Server address WOLFSSL_TLS_SERVER_HOST value to connect to, shown here for an example address of 192.168.1.39

Both the Arduino Client and Server sketches can of course be used to communicate with the wolfSSL executables, found in the examples/client and examples/server directories. These are built automatically when running make from the root of the wolfSSL clone:
./configure --enable-all
make clean
make && make test
./examples/client/client -h 192.168.1.39 -p 11111
Keep in mind that workstation examples may need firewall rules and/or anti-virus adjusted when communicating with external embedded devices such as the Arduino boards. The wolfSSL TLS examples typically use port 11111.
Want to customize the wolfSSL settings? See the user_settings.h file in
C:\Users\%USERNAME%\Documents\Arduino\libraries\wolfssl\src
It’s best to not directly include the wolfSSL user_settings.h file in your code. When including the library, there’s a settings.h file that will automatically include the user_settings.h file as appropriate, along with making some default environment settings.
See the documentation for more details on settings. For embedded targets such as Arduino, all of the settings are the #define values in the user_settings.h file.
Details on how we publish wolfSSL to Arduino can be found in our wolfSSL/IDE/ARDUINO GitHub directory. If you have a local clone of wolfSSL, you can use the wolfssl-arduino.sh script to install your own latest version of wolfSSL directly to your Arduino libraries directory like this:
./wolfssl-arduino.sh INSTALL
Note that there’s only a Linux bash command. Windows users are encouraged to use WSL. See the README file for more information.
If any problems are encountered with the sketch, sometimes it can be helpful to delete the build cache directories. For Windows users, this is in the AppData directory:
C:\Users\%USERNAME%\AppData\Local\Temp\arduino\sketches
Find out more
If you have any feedback, questions, or require support, please don’t hesitate to reach out to us via facts@wolfSSL.com, call us at +1 425 245 8247, or open an issue on GitHub.
Download wolfSSL Now